
Technical Articles
Understanding and Addressing Garage Floor Paint Chips
Views :
Update time : 2025-10-15
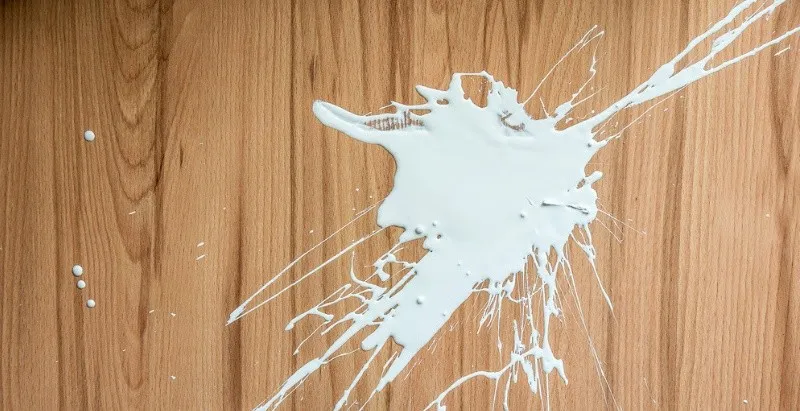
Garage floor paint chips are a common frustration for many homeowners, as they not only ruin the appearance of the space but also can lead to further damage if left unaddressed. These small, flaky pieces of paint often start as minor blemishes but can spread over time, exposing the underlying concrete and making the floor more vulnerable to stains, cracks, and moisture damage.
One of the primary causes of garage floor paint chips is poor surface preparation before painting. If the concrete floor isn’t properly cleaned, etched, or repaired before applying paint, the paint won’t adhere well. Dust, oil, grease, or existing cracks in the concrete can create gaps between the paint and the surface, causing the paint to peel and chip off easily. For example, if a garage floor has old oil stains that aren’t fully removed, the paint applied over them will struggle to bond, leading to chips within months of application.
Another common factor is using low-quality or incorrect paint. Not all paints are designed for garage floors—spaces that experience heavy foot traffic, vehicle weight, and exposure to chemicals like gasoline or antifreeze. Using interior wall paint or a thin, low-durability paint on a garage floor will result in quick wear and chipping. High-traffic areas, such as near the garage door or where cars are parked regularly, are especially prone to this issue, as the constant pressure and friction break down the paint layer.
Moisture is also a significant contributor to paint chipping. Concrete is porous, and if moisture seeps up from beneath the floor (often due to poor drainage or a lack of a vapor barrier), it can loosen the paint’s adhesion. Over time, this moisture causes the paint to bubble, peel, and eventually chip. In areas with cold winters, freeze-thaw cycles can worsen the problem: moisture trapped in the concrete expands when frozen, cracking the paint and creating more chips.
Preventing garage floor paint chips starts with proper preparation. First, thoroughly clean the floor using a degreaser to remove oil, grease, and dirt. Then, repair any cracks or holes with a concrete patching compound, and etch the surface with a concrete etcher to create a rough texture that helps the paint adhere. Next, choose a high-quality, garage-specific paint—such as epoxy paint, which is durable and resistant to chemicals and wear. Finally, apply the paint in thin, even coats, allowing each coat to dry completely before adding the next.
If chips have already formed, repairing them is relatively simple. Start by cleaning the chipped area with soap and water, then scrape away any loose paint with a putty knife. If the concrete beneath is damaged, fill the area with a concrete patching compound and let it dry. Once the surface is smooth, apply a small amount of matching garage floor paint to the chipped spot, using a small brush for precision. Allow the paint to dry fully, and the repair will blend in with the rest of the floor.
By understanding the causes of garage floor paint chips and taking the right steps to prevent and repair them, homeowners can keep their garage floors looking clean, professional, and durable for years to come. Ignoring small chips can lead to bigger problems, so addressing the issue early is key to maintaining the longevity and appearance of the garage floor.
Related News
What are the application scenarios for e
Jul .02.2026
What are the application scenarios for epoxy color...
Understanding and Addressing Garage Floo
Oct .15.2025
Garage floor paint chips are a common frustration ...
how to remove paint from vinyl flooring?
Oct .13.2025
Vinyl flooring is a favorite among homeowners than...
Polyurethane Floor Paint: A Practical Gu
Oct .09.2025
I. Introduction For those seeking to improve the ...